Unity 补完计划(四):UGUI-10:Image & RawImage
前言
将 MaskableGraphic 分析完之后,就可以来看 UGUI 中真正使用到的图像组件了。Image 和 RawImage 是 UGUI 中最常用的两个图像组件,它们分别用于显示 Sprite 和 Texture。本文将分析这两个组件的实现。
Sprite 与 Texture
在 UGUI 中,Sprite 和 Texture 是两个最常用的图像资源。Sprite 是 Unity 引擎中专门用于 2D 图像的资源,它包含了图像的像素数据、UV 坐标、边界信息等。Texture 是 Unity 引擎中用于存储图像像素数据的资源,它可以被 Sprite 使用,也可以被 RawImage 使用。
Unity 的官方手册中,这样描述 Sprite :
-
Sprite是一种 2D 图形对象,用于 2D 游戏中的角色、道具、飞弹和其他游戏元素。图形是从位图图像Texture2D获取的。Sprite类主要标识应该用于特定精灵的图像部分。然后,GameObject上的SpriteRenderer组件可以使用该信息来实际显示图形。 -
Sprite是 2D 图形对象。如果习惯于在 3D 空间中工作,Sprite本质上只是标准纹理,但可通过一些特殊技巧在开发过程中组合和管理精灵纹理以提高效率和方便性。
由 Sprite 的描述可以看出,Sprite 依然是一个 2D 图形对象,它只是对 Texture2D 的一个封装。Sprite 除了包含 Texture2D 的像素数据外,还包含了一些额外的信息,比如 UV 坐标、边界信息等。
1 | // Sprite.cs |
从 Sprite 的定义中也可以看出这一点,Sprite 中不仅包含了 Texture2D 的像素数据,还包含了 bounds、rect、border 等信息。
RawImage
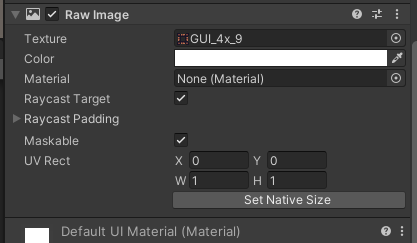
RawImage 的实现十分简单,仅仅是重写了 Graphic 的 mainTexture 属性以及 OnPopulateMesh() 方法,用于设置显示的 Texture。此外,还提供了一个 UV Rect 属性,用于设置显示的 Texture 的 UV 坐标。
通过前面对
Graphic的分析我们知道,mainTexture是真正提交给CanvasRenderer的纹理,而OnPopulateMesh()方法则会在UpdateGeometry()方法中被调用,用于生成顶点信息。
1 | public class RawImage : MaskableGraphic |
在 OnPopulateMesh() 方法中,会将 Texture 的大小信息以及 UV Rect 信息传递给 VertexHelper,用于生成顶点数据。
此外,在 RawImage 中实现了一个 Graphic 中定义的虚函数 SetNativeSize(),用于将 RawImage 的大小设置为 Texture 的原始大小。
1 | /// <summary> |
Image
相比于 RawImage,Image 就要复杂许多。二者的区别主要在于:
-
Image使用Sprite作为显示的图像资源,而RawImage使用Texture作为显示的图像资源。 -
Image提供了四种不同的显示模式:Simple、Sliced、Tiled和Filled。相关的顶点生成方法非常复杂,使得
Image.cs足足达到了 1800 行。
Image 的显示模式
Image 提供了四种不同的显示模式,分别是 Simple、Sliced、Tiled 和 Filled。这四种显示模式是通过 Type 枚举来定义的。
1 | public enum Type |
-
Simple模式:直接显示Sprite,会随着RectTransform的大小进行缩放。此时
Sprite会随着RectTransform改变长宽比例,可能会造成图像的拉伸或压缩。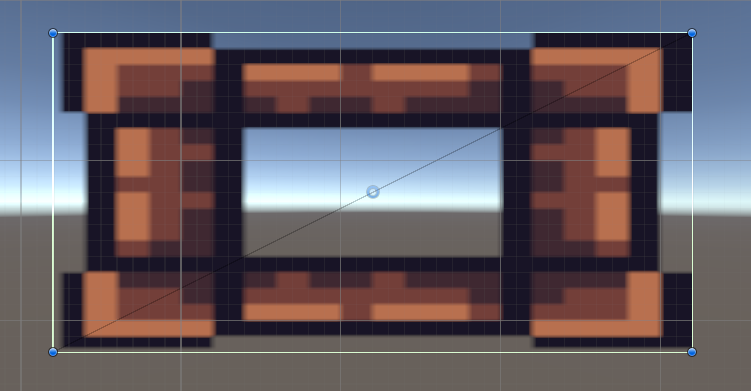
-
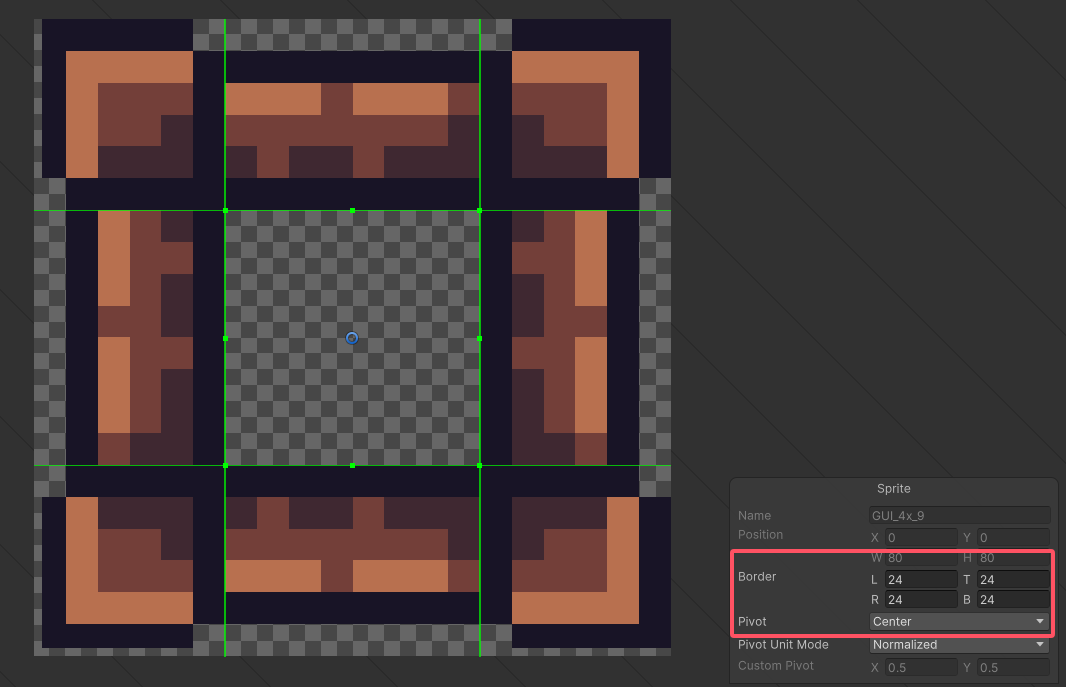
Sliced模式:九宫格模式,RectTransform改变时,会根据Sprite的border属性进行缩放。这种模式下当
RectTransform改变时,将只会缩放九宫格的中间部分,而四个角的部分不会缩放。非常适合用于对话框等 UI 元素。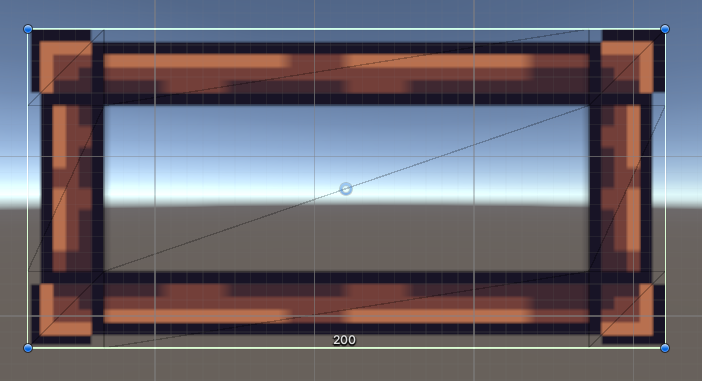
-
Tiled模式:平铺模式,RectTransform改变时,会根据Sprite的border属性进行平铺。这种模式下,
Sprite会根据border属性进行平铺,四个角的部分不会被拉伸。适合用于地砖以及墙壁等需要平铺的 UI 元素。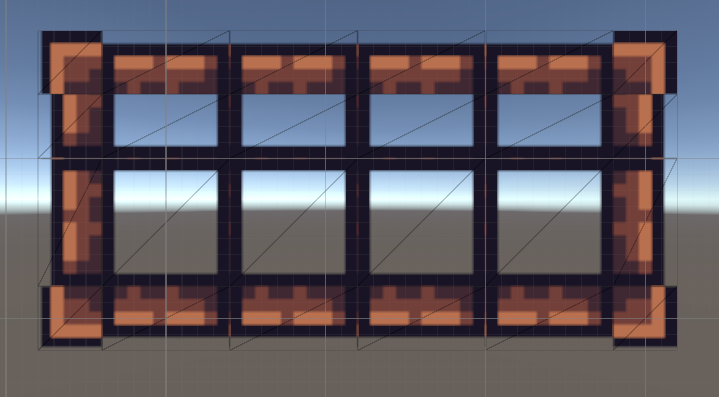
-
Filled模式:填充模式,根据fillMethod以及fillAmount属性对Sprite进行填充。非常适用于血条、进度条等场景。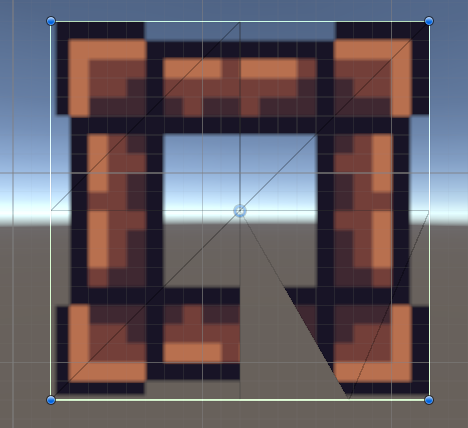
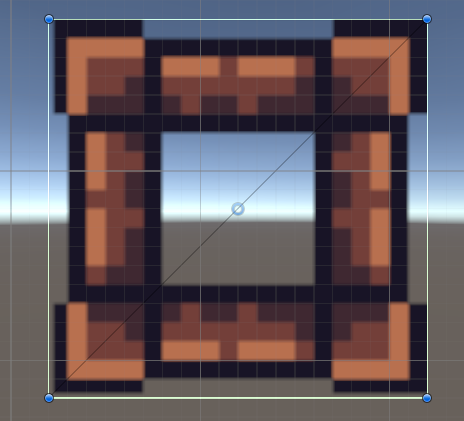
对比填充度满的情况可以发现,二者的顶点数据是不同的。也就是说,填充的功能是通过设置不同的顶点三角形来实现的。
mainTexture 的重写
Image 同样重写了 Graphic 的 mainTexture 属性,用于设置显示的 Sprite。
1 | public override Texture mainTexture |
当 activeSprite 不为空时,则由 activeSprite.texture 提供渲染的纹理。
1 | [] private Sprite m_Sprite; |
由 m_Sprite 和 m_OverrideSprite 共同决定了 activeSprite 的值。此外,在设置 Sprite 时,也会设置脏标记以触发重新渲染。
OnPopulateMesh() 的重写
Image 重写了 OnPopulateMesh() 方法,用于支持不同显示模式下的顶点生成。
1 | protected override void OnPopulateMesh(VertexHelper toFill) |
在 OnPopulateMesh() 方法中,根据 type 的不同,调用不同的生成顶点数据的方法。这里就不再详细展开了,有兴趣的读者可以自行查看源码。
通过 useSpriteMesh 属性可以控制是否使用 Sprite 的顶点数据,二者顶点的差别在 Graphic 中已经分析过,默认的顶点就是一个简单的两个三角形组成的矩形,而 Sprite 的顶点则会根据透明度进行裁剪。
UpdateMaterial() 的重写
Image 也重写了 UpdateMaterial() 方法,不过并没有处理太多额外的逻辑。只是针对 RGBA 和 RGB + A 的两种情况,设置了 CanvasRenderer 的 alphaTexture 属性。
1 | protected override void UpdateMaterial() |
ILayoutElement 接口的实现
仔细观察 Image 与 RawImage 的定义我们可以发现,Image 实现了 ILayoutElement 接口,而 RawImage 没有实现。这意味着 Image 可以参与到布局系统的计算中,而 RawImage 则不行。
忘记了这部分内容的读者可以查看 LayoutRebuilder
1 | public virtual void CalculateLayoutInputHorizontal() {} |
这两个函数用于计算布局信息,实际上只有 LayoutGroup 这种会随着子物体而改变 PreferredSize 等属性的组件才需要实现这两个函数,大部分的 ILayoutElement 实现都是空函数。因此 Image 也不例外。
1 | public virtual float minWidth { get { return 0; } } |
接下来的这些属性就是我们熟悉的 minSize、preferredSize、flexibleSize 以及 layoutPriority 了。这些属性用于布局系统的计算,Image 中,会根据 activeSprite.pixelsPerUnit 以及 activeSprite.rect.size 来计算出 minSize 和 preferredSize。
因此,如果 Image 和 RawImage 同时作为子物体,当父物体带有某种 LayoutGroup 组件时并且开启了 Control Child Size 选项,那么 Image 会根据 Sprite 的大小得到正确的布局信息,而 RawImage 则会直接坍缩为 0。
Image 和 RawImage 的区别
关于这两个组件之间的区别,上文已经提到了一些。这里再总结一下:
-
Image使用Sprite作为显示的图像资源,而RawImage使用Texture作为显示的图像资源。 -
Image提供了四种不同的显示模式:Simple、Sliced、Tiled和Filled,而RawImage只能直接显示Texture,相当于Image的Simple模式。 -
渲染效率方面,使用
Image相比RawImage在一些情况下可以减少DrawCall的数量。 由于RawImage使用的是单独的Texture,因此每一个RawImage在显示时都会触发一次DrawCall。而Image使用的是Sprite,可以使用SpriteAtlas来进行批量渲染,如果多个Image组件所使用的Sprite在同一个SpriteAtlas中,那么只会触发一次DrawCall。但带来的问题就是整个
SpriteAtlas都会被加载到内存中,如果SpriteAtlas中的Sprite过多,可能会导致内存占用过高。 -
Image实现了ILayoutElement接口,可以参与到布局系统的计算中,而RawImage则不行。如果需要在布局系统中使用
RawImage,可以通过在RawImage上添加一个LayoutElement组件来实现。
合批的 🌰
我们新建一个场景,运行游戏并点击 Game 窗口的 Stats,可以看到当前的 DrawCall 数量。
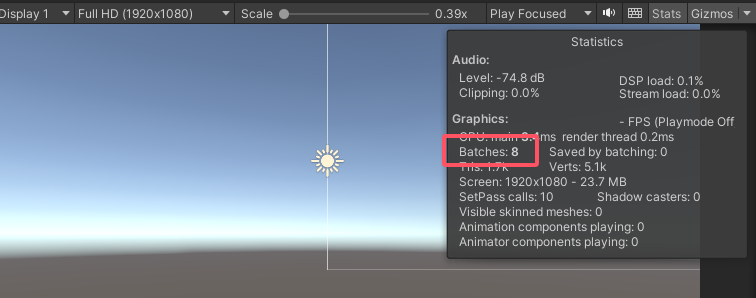
在没有任何 UI 元素时,基本的 DrawCall 数量为 8,可能是绘制背景、Gizmos 等。
我们导入三张独立的图片,并将 Texture Type 设置为 2D,然后新建三个 RawImage 组件,分别显示这些图片。
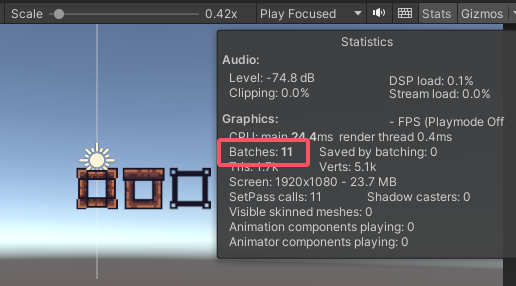
运行游戏,可以看到 DrawCall 数量变为 11。这说明三张 RawImage 组件分别触发了三次 DrawCall。
接着,我们导入另外三张独立的图片,并将 Texture Type 设置为 Sprite(2D and UI),然后新建三个 Image 组件,分别显示这三张图片。
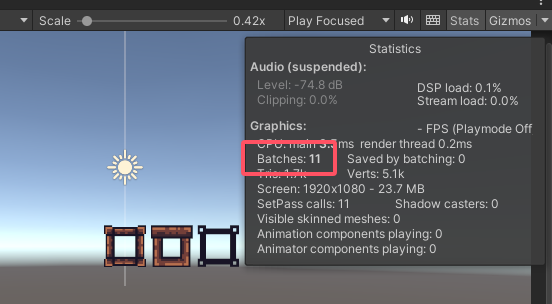
运行游戏,我们发现 DrawCall 数量仍然为 11。说好的减少 DrawCall 呢?
别急,让我们继续分析。
我们新建一个 SpriteAtlas,将这三张图片打包到 SpriteAtlas 中,然后将 Image 组件的 Sprite 设置为 SpriteAtlas 中的 Sprite。
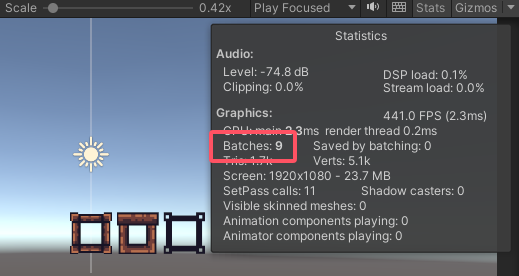
然后运行游戏,可以看到 DrawCall 数量变为 9。这说明三个 Image 组件只触发了一次 DrawCall。
然而,即使将 RawImage 的 Texture 设置为 SpriteAtlas 中的 Sprite,DrawCall 数量仍然为 11。这说明 RawImage 无法使用 SpriteAtlas 进行批量渲染。
此外,在 UGUI 的制作中,有许多 Sprite 实际上是使用 Sprite Editor 从一张大图中切割出来的。这种情况下,使用 Image 能够减少 DrawCall 吗?
我们如此设置,再运行游戏。就会发现,DrawCall 的数量确实减少到了 9。这说明使用 Sprite Editor 切割出来的 Sprite 依然会进行批量渲染,减少 DrawCall 的数量。
总结:在使用独立的图片时,Image 和 RawImage 的 DrawCall 数量是一样的。但是当使用 SpriteAtlas 或者 Sprite Editor 切割出来的 Sprite 时,Image 会进行合批,减少 DrawCall 的数量。
总结
本文我们简单分析了 Image 和 RawImage 的实现。Image 和 RawImage 是 UGUI 中最常用的两个图像组件,它们分别用于显示 Sprite 和 Texture。Image 提供了四种不同的显示模式,可以根据需求选择。RawImage 则是一个简单的图像组件,只能直接显示 Texture。
在使用 Image 时,可以使用 SpriteAtlas 来进行批量渲染,减少 DrawCall 的数量。而 RawImage 无法使用 SpriteAtlas 进行批量渲染,每一个 RawImage 都会触发一次 DrawCall。
此外,Image 实现了 ILayoutElement 接口,可以参与到布局系统的计算中,而 RawImage 则不行。如果需要在布局系统中使用 RawImage,可以通过在 RawImage 上添加一个 LayoutElement 组件来实现。